
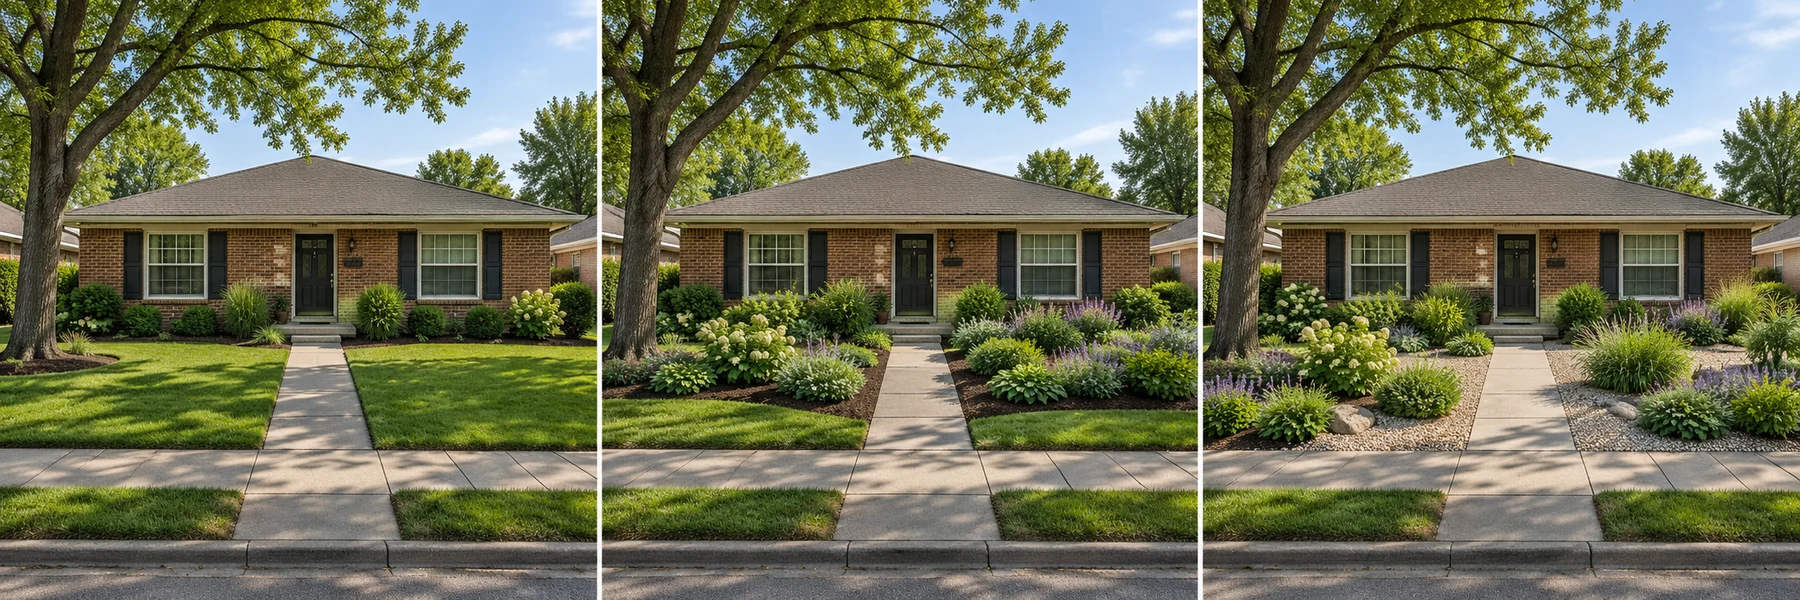
A front yard can look cared for without demanding every Saturday. The useful question is not “Which plants need no care?” It is “Which chores do I want less of, and what can I change without creating a different problem?”
Start small: keep what works, simplify the shape of one bed, choose plants that fit at maturity, and make watering new plants easy. You do not have to remove every blade of grass or redo the whole entrance.

Choose the kind of “less work” you actually want
- Less mowing: keep one useful lawn shape and join awkward edges into a continuous bed.
- Less trimming: choose plants whose mature size fits, rather than continually cutting oversized shrubs back.
- Less hand watering: consolidate planting where you can reach it and group compatible water needs.
This is a design tradeoff, not a promise of a maintenance-free garden. EPA WaterSense recommends matching landscape choices to use, climate and site conditions. Read its landscape planning guidance.
Keep lawn where you use it. If a simple rectangle gives children room to play or makes the front look calm, keeping it may suit you better than creating a large new bed. Removing lawn only helps if you prefer caring for its replacement.
Three front-yard approaches worth comparing
1. Keep the lawn; simplify the planted edges
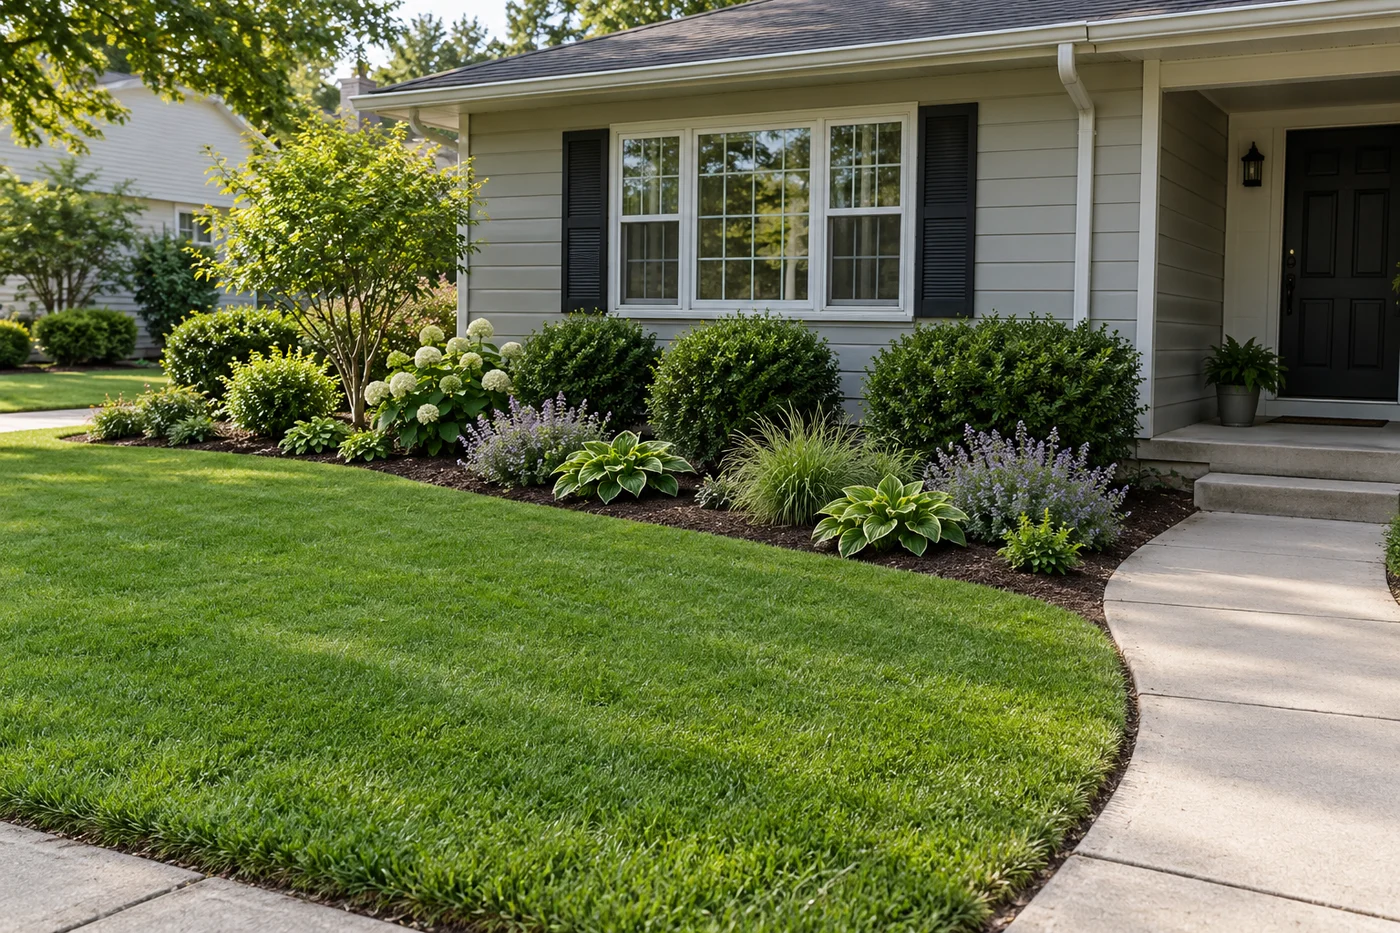
Look for one connected bed edge. Rounded shrubs here do not establish that trimming is unnecessary; check natural mature form and care needs. This concept is separate from the next yard and is not the $1,000 starter bed below.
Best when you want a manageable first project and the existing lawn works. Join small disconnected beds into one clear shape, retain healthy plants, and repeat a short plant palette instead of buying one of everything.
Start with the bed beside the front walk or porch. A well-defined small area can make the entrance feel finished while the rest waits. Keep mature plants off the walkway and away from windows, meters and service access.
Tradeoff: you still mow. The gain comes from fewer awkward edges and plants that do not need regular size control.
2. Reduce lawn where it is awkward or unused
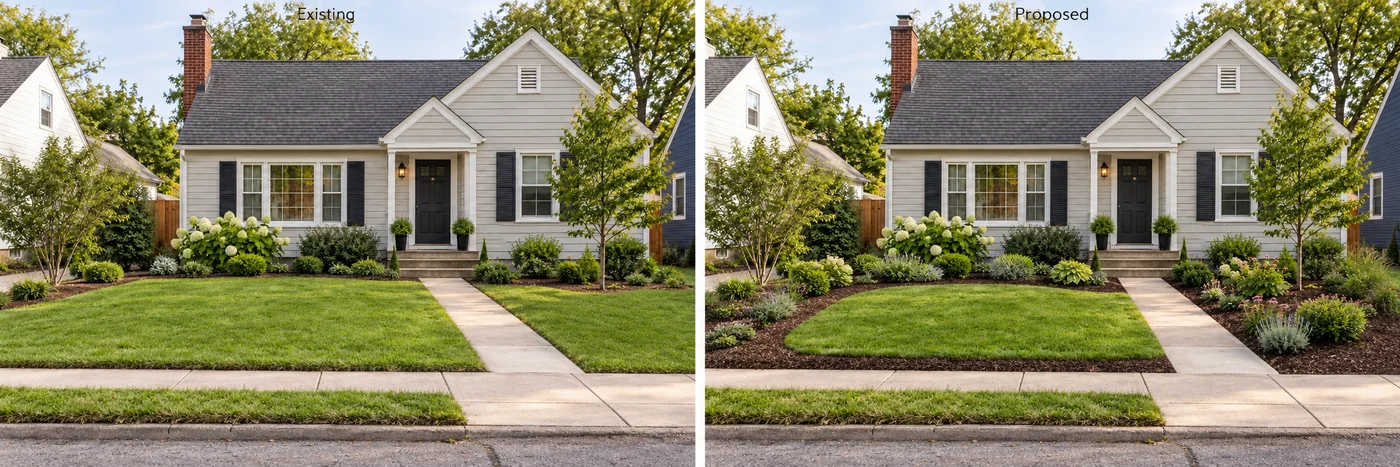
Existing (left) and proposed (right): the bed extends forward, reducing lawn while keeping a useful open area and the front walk. This is a hypothetical AI comparison, not a real before-and-after project.
Best when narrow strips and isolated patches are more nuisance than useful space. Extend an existing bed into those areas rather than converting the whole yard at once. Lay a hose on the ground to preview the edge before removing grass.
Tradeoff: new beds need preparation, weed management and establishment care. Take on only as much planted area as you can realistically monitor.
3. Try a contained gravel accent
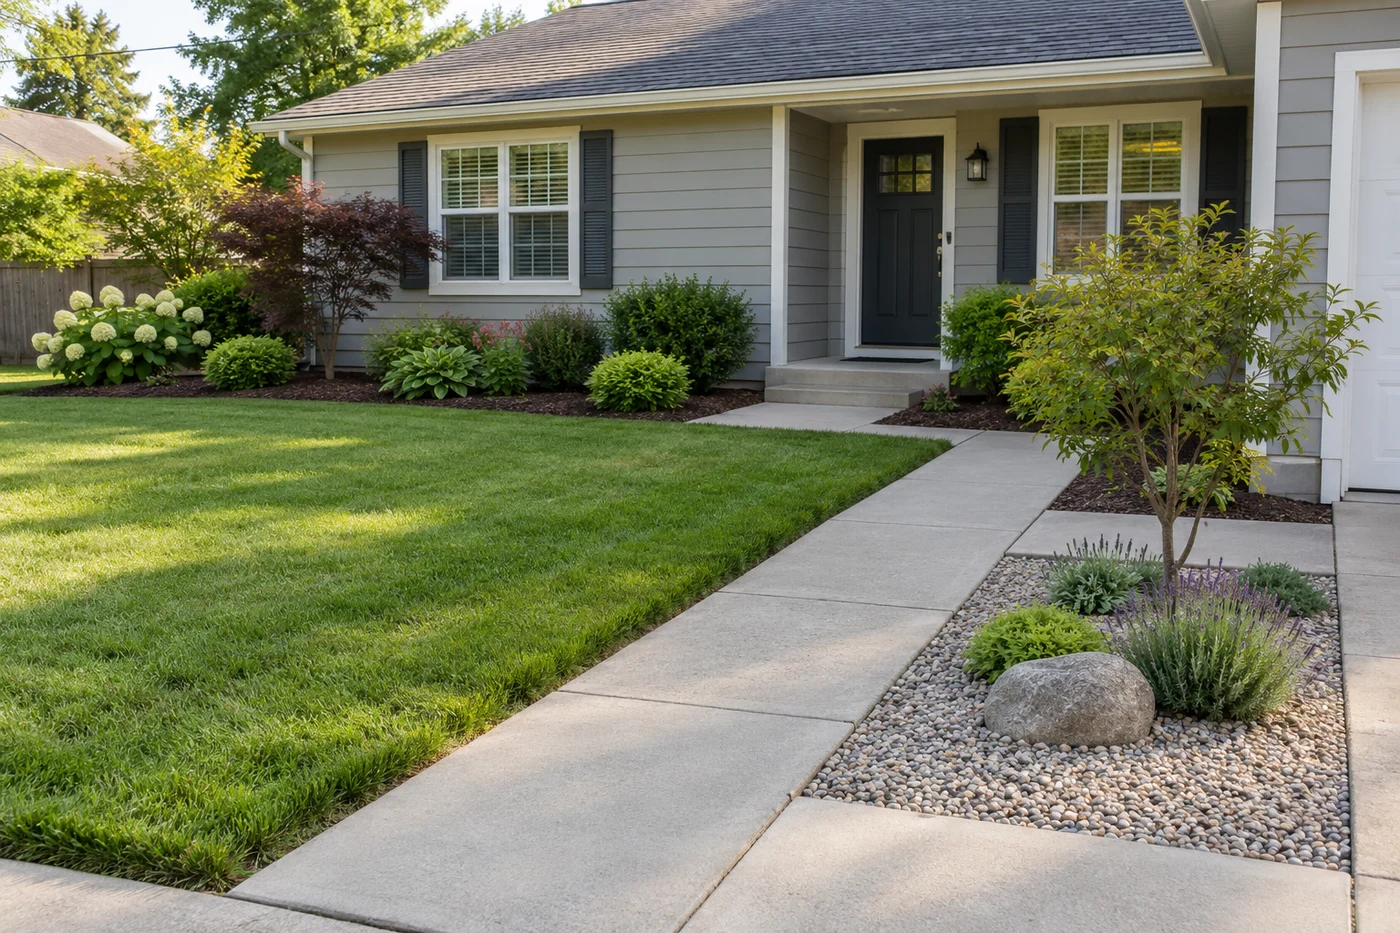
Stone can be a small accent. This example retains the lawn and keeps gravel contained; it does not require converting the whole yard.
Best when stone fits the house, local climate and intended use. A small gravel accent or a clearly defined path can add structure without covering the entire front yard in rock.
Tradeoff: rock still collects leaves and weeds, can move into adjacent surfaces, and can be difficult to remove later. In hot settings it can increase heat around plants and people. University of Nevada Extension explains rock-mulch heat effects. Compare a small test area before ordering a truckload.
Compare a year of chores before choosing
For a flat yard with a deciduous tree, plants suited to the site, and no unresolved drainage problem. This is an illustrative care comparison, not measured labor hours or a universal schedule.
- Keep lawn and simple beds: mowing and edging remain, with a smaller planted area to weed and establish.
- Reduce lawn and enlarge beds: mowing drops, but planting, weed checks and seasonal cutback cover more ground.
- Add a contained gravel accent: the main lawn still needs mowing. Check the stone pocket for trapped leaves, weeds and displaced gravel, alongside the usual plant care.
A first-year routine for the sample bed: after planting, check moisture frequently enough to learn how the bed dries, especially during hot or windy weather; water when the plant and soil conditions call for it. Pair each check with a look for weeds and wilt. After rain, check that water is not pooling. Later, adjust the routine with the supplier's written care instructions. Before travel, arrange someone to check the new plants. The routine may become lighter after establishment, but the calendar alone does not tell you that roots are ready.
Read the yard before choosing plants
Take one photo from the street and one from the front door. Note where sunlight falls in the morning, midday and afternoon; repeat in another season when possible. Record puddles after rain, dry spots near paving, established tree roots, irrigation components and the path people actually use.
Find your winter hardiness zone using the USDA map, then consider conditions it does not capture: summer heat, reflected light, wet soil, exposure and local water restrictions. Ask a local Extension office about uncertain soil or drainage conditions.
A useful plant shortlist starts with mature height and spread, light, soil, water needs and maintenance, rather than flower color alone. NC State's woody plant selection guide explains these criteria.
Build a small palette, not a universal shopping list
Choose a role, then a locally suitable plant:
- Low structure: check mature height below the window and whether the natural form needs shearing.
- Seasonal color: ask when perennials need cutting back or dividing.
- Path edges: allow for spread, flopping and seedlings; avoid thorns beside daily routes.
- Winter interest: consider evergreen structure or persistent form that fits local conditions.
Regional starting points differ. In parts of North Carolina, an appropriately selected inkberry cultivar may provide evergreen structure; verify soil and moisture fit through NC State's native plant guidance. In Minnesota, investigate native Diervilla, not an unidentified plant sold simply as “honeysuckle”; UMN explains the recommended species. A Phoenix yard needs a different local heat- and irrigation-aware shortlist. These are research leads, not interchangeable planting recipes.
One way to reject the wrong plant before buying it
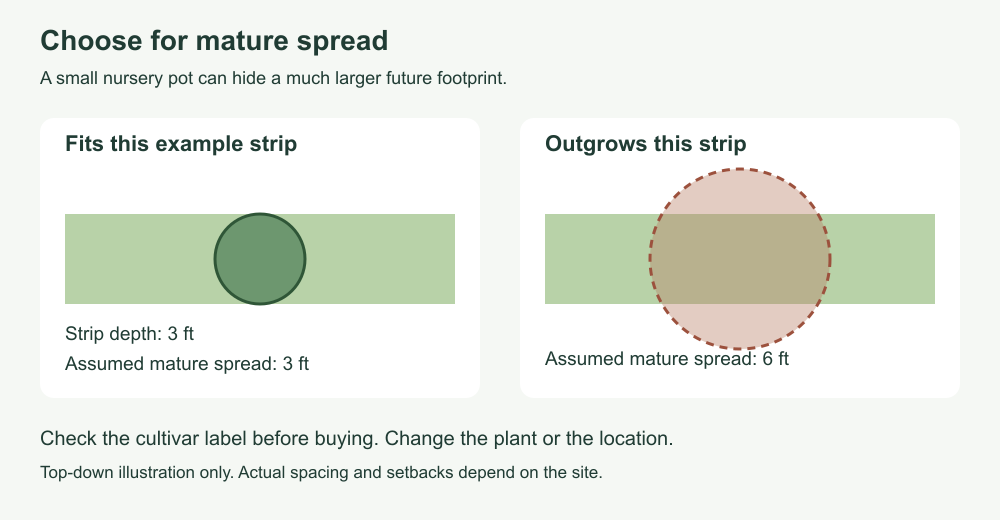
Original top-down size comparison. The green strip is 3 feet deep in both panels; circles show assumed mature spreads. This tests fit, not a universal setback or spacing rule.
Suppose the free planting strip is only 3 feet deep, but a shrub's label says 6 feet wide at maturity. Reject it for that location rather than planning to keep it small with repeated trimming. If another candidate needs a wetter watering pattern than its neighbors, change the candidate or redesign the irrigation grouping. A pleasing leaf color does not solve either mismatch.
A first bed you can measure and price
Use a 12-foot by 5-foot existing bed as a planning exercise. It is 60 square feet, not a prescription for every foundation or tree-root area.
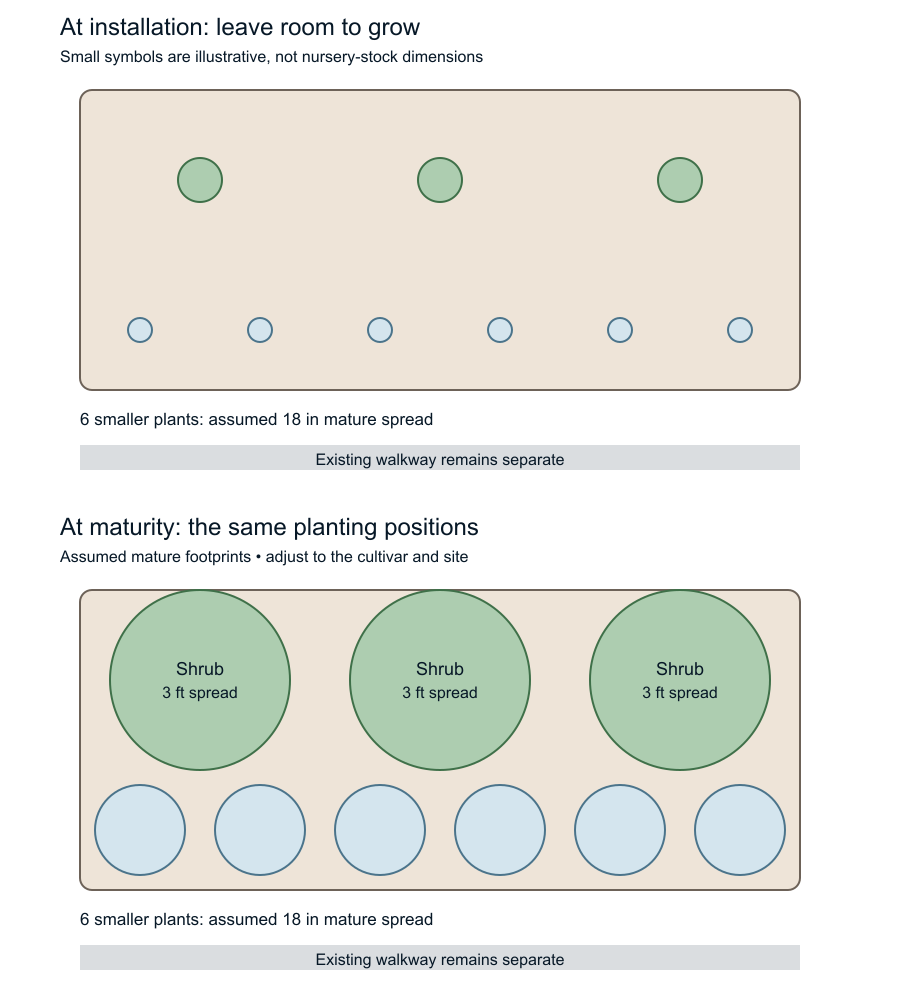
Original planning diagrams. The installation panel uses small schematic symbols to show intentional gaps, not nursery-stock sizes. The mature panel uses the same planting positions. Circles represent assumed mature footprints, not guaranteed plant growth. Species must be selected for the actual site. The example is not a foundation, drainage or utility setback specification.
For this example, reserve three positions for compact shrubs with an assumed 3-foot mature spread, plus six positions for smaller plants with an assumed 18-inch spread. The drawing shows how much space remains; it does not require filling every gap immediately. If your chosen cultivar is larger, change the layout and quantity before buying.
For mulch arithmetic, an empty 60-square-foot area covered 2 inches deep is 10 cubic feet, or five 2-cubic-foot bags. Existing mulch, root balls and planted footprints change the actual order. Depth also depends on material and planting; keep mulch away from stems and trunks. UConn's mulch guide explains placement.
Turn a spending limit into a real shopping list
Here is a hypothetical $1,000 DIY allocation, not researched retail prices or a local project quote. Replace every allowance with local prices before purchasing.
- Three shrubs at an assumed $50 each: $150.
- Six smaller plants at an assumed $20 each: $120.
- Mulch/material allowance: $60; edging: $100.
- Preparation, rental tools and disposal: $170.
- Watering supplies and delivery: $150.
- Tax and contingency reserve: $250.
- Total cap: $1,000.
Before buying, write down the actual container sizes, plant dimensions, material quantities, delivery charges and local prices. An allowance is not a specification.
A small first phase is easier to adjust than a full conversion. Photograph and measure, get actual prices, then cut scope if necessary. Keep healthy plants or reuse suitable edging before sacrificing preparation or the ability to water. A lower cap may mean doing half the bed, not buying unsuitable plants.
For hired work, request an itemized quote covering removal, disposal, preparation, materials, planting sizes and quantities, irrigation changes, access, taxes, establishment care and exclusions. Do not assume this DIY worksheet includes labor, grading, paving or retaining walls.
Three checks before planting
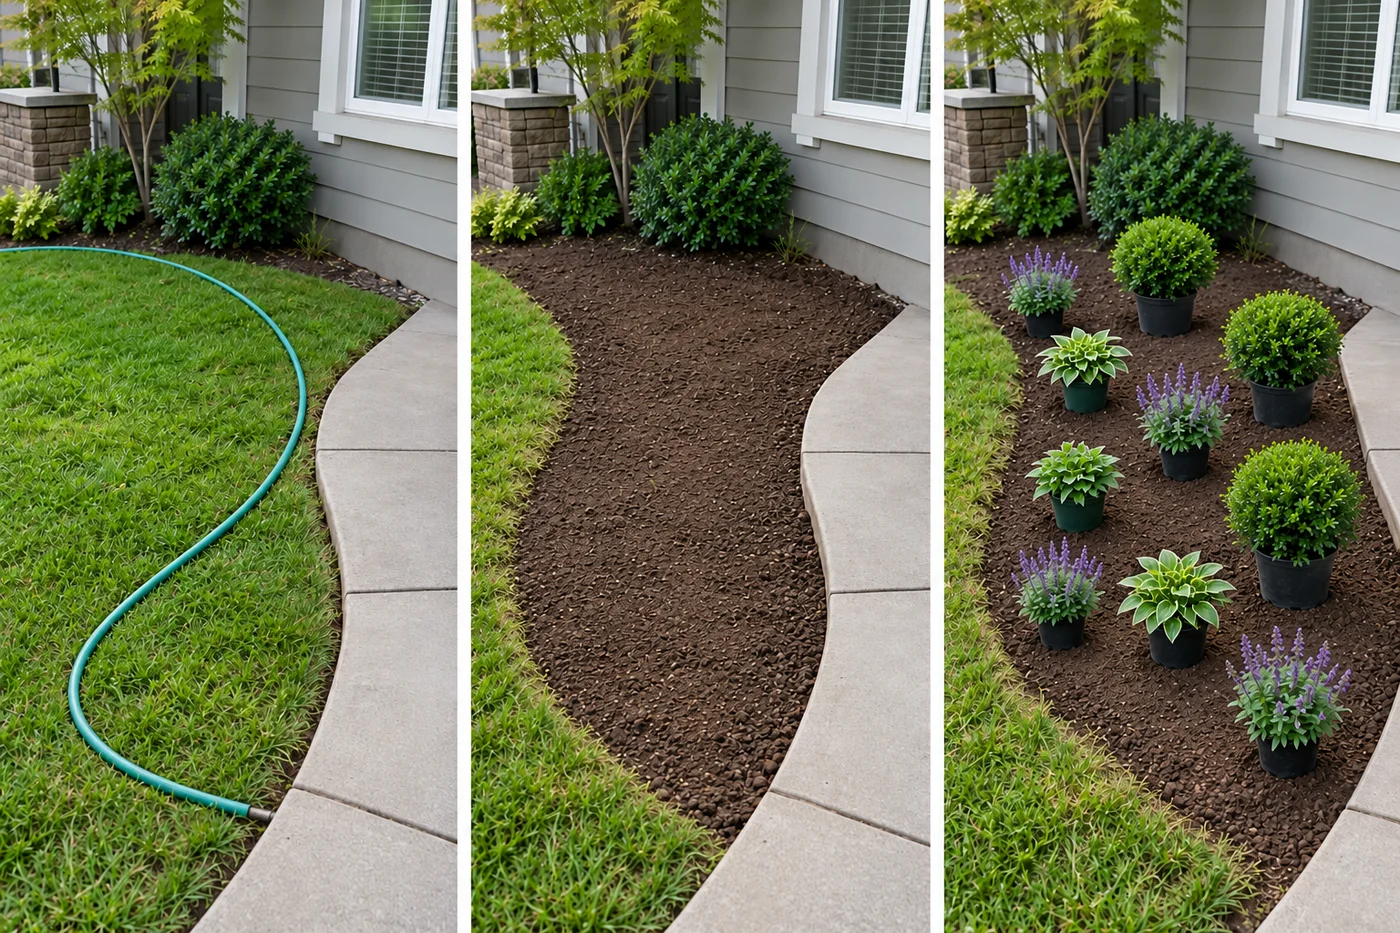
Left to right: Mark, Prepare, Position pots. These are illustrative views of the tasks, not an exact record of one bed conversion: the generated boundaries and pot count differ. In your yard, the prepared boundary should follow your approved outline. Use the separate measured diagram for the nine-position example. Check utilities and protect retained roots before disturbing soil.
For an existing bed, identify what stays, remove weeds and unwanted plants without damaging retained roots, and check the soil and drainage before adding material. Do not automatically pile new soil over old roots or raise the level against the house.
For an area of lawn, mark the boundary and utilities first. Choose a grass-removal method appropriate to the grass and site—physical removal and slower smothering approaches have different effort and timing. Get local advice for persistent spreading grass. Remove or suppress the grass before planting rather than covering live turf with a thin layer of mulch and hoping it disappears. Recheck the surface level, roots and drainage, then lay out the pots at their planned spacing before digging. Iowa State Extension compares grass-removal methods, including their advantages and limitations.
Pause for significant tree roots, unidentified utilities, persistent standing water or a proposed change in grade. A bed conversion is a reasonable DIY job only when those constraints are understood. A slow removal method may mean preparing now and planting later, not finishing in one weekend.
A request you can send to an installer
Please quote improving this measured bed while retaining the existing walk, tree and healthy plants marked on the sketch. My goal is less [mowing / trimming / hand watering]. Include removal, disposal, preparation, plant names and purchase sizes, quantities, edging, watering changes, taxes, access protection and first-year care. Separate optional work and explain replacement terms. My spending limit is $____; propose a smaller phase if needed.
What upkeep looks like after the photo
At installation: confirm plant identity and spacing, water appropriately, cover exposed soil with suitable mulch, and make sure you can reach every plant.
During establishment: use the first-year routine above, with the supplier’s site-specific instructions. Drought tolerance does not mean new plants can be ignored immediately. University of Maryland Extension explains how watering changes with soil, weather and plant age.
As a recurring routine: walk the bed, check plant stress and irrigation, remove new weeds, and clear access routes. After storms, check displaced material and pooled water.
Seasonally: follow the chosen species' pruning and cutback needs; check mulch before adding more; adjust watering as conditions change. Ask whoever supplies the plants for a written first-year care schedule and what happens if a plant fails.
Before a trip: arrange moisture checks for new plantings. A garden that is easy after establishment may still need help while you are away in its first summer.
Mulch, gravel or landscape fabric?
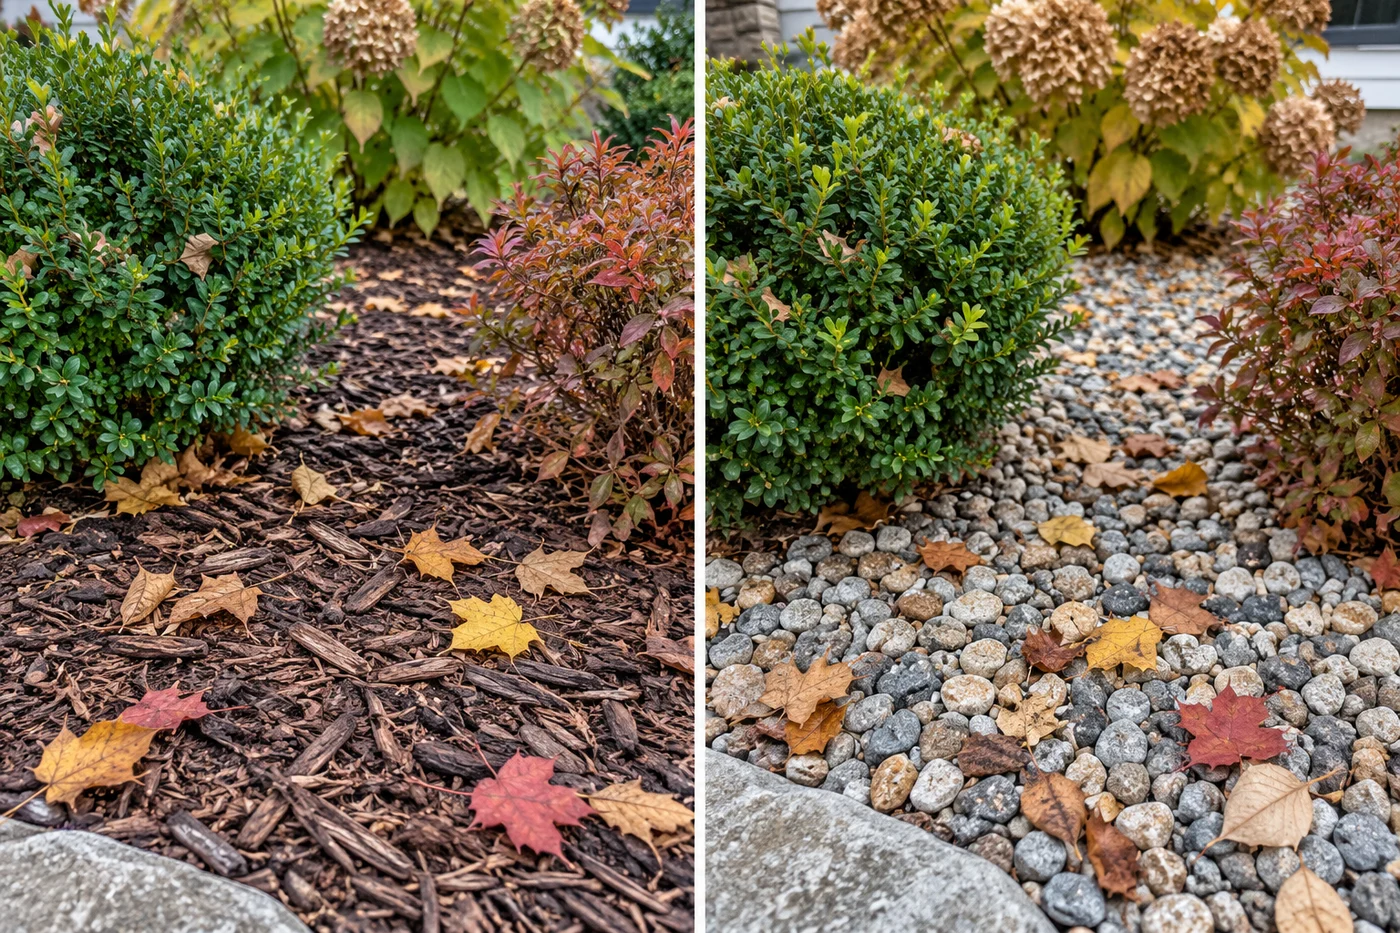
Left: bark mulch. Right: gravel. Leaves reach both surfaces; among stones they can be harder to collect. Compare the cleanup you are willing to do, not just the day-one appearance. AI illustration.
Organic mulch needs occasional replenishment; gravel needs debris and weed management. Neither permanently prevents weeds. Fabric is not an automatic upgrade: it may complicate later planting and removal, and the right choice depends on how the area will be used. Colorado State Extension discusses mulch and fabric tradeoffs. Ask how the bed will be maintained and changed, not only how it looks on day one.
Adapt the plan to your climate
- Hot, dry yards: consider reflected heat, shade at the entrance and watering access. Group plants with compatible water needs; do not infer water needs from an AI picture.
- Humid or wet yards: investigate persistently wet soil before adding plants. A plant described as drought tolerant is not automatically suited to poor drainage.
- Cold or snowy yards: preserve a place for shoveled snow and check exposure to road salt. Look at winter form and local hardiness, not just summer flowers.
Keep a clear route to the front door. Check buried utilities before digging, and have local professionals assess changes to grades, drainage, significant roots, walls or permanent paving. Local requirements and tree protections vary.
Your next step
Choose one visible area. Measure it, note its conditions, name the chore you want to reduce, and price one feasible first phase. A front yard that asks less of you starts with fewer mismatches—not necessarily fewer plants.
Ready to picture your front yard differently?